Quick start: the first booking
WirdThis synchronisiertis …how you record your first backend booking — from the button to the success message it takes
less than a minute.
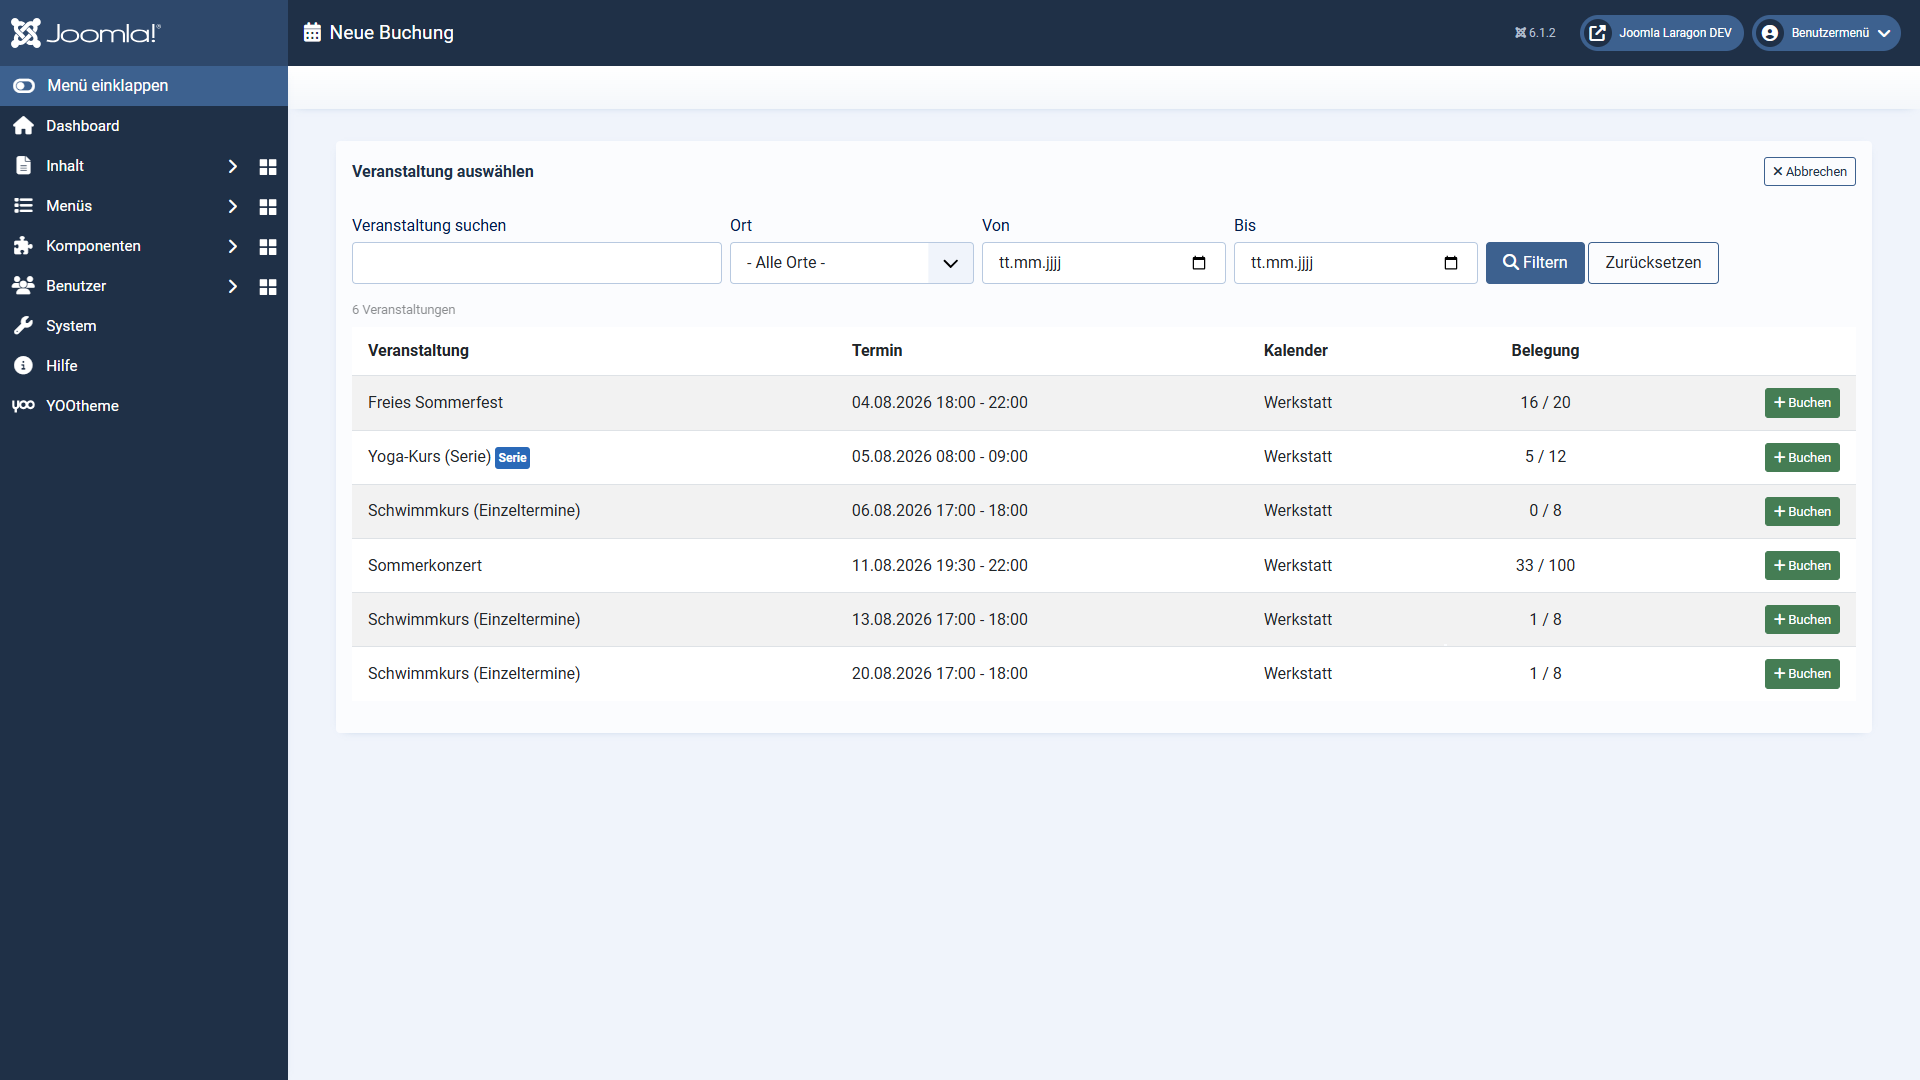
Step 1: choose an event
Open Components → DPCalendar → Bookings and click New booking in the
toolbar.
You see the list of bookable events from the enabled calendars — with date, calendar and
current occupancy. Use the filter bar to narrow the list down if needed.
Click Book in the row of the event you want.
Step 2: fill in the booking
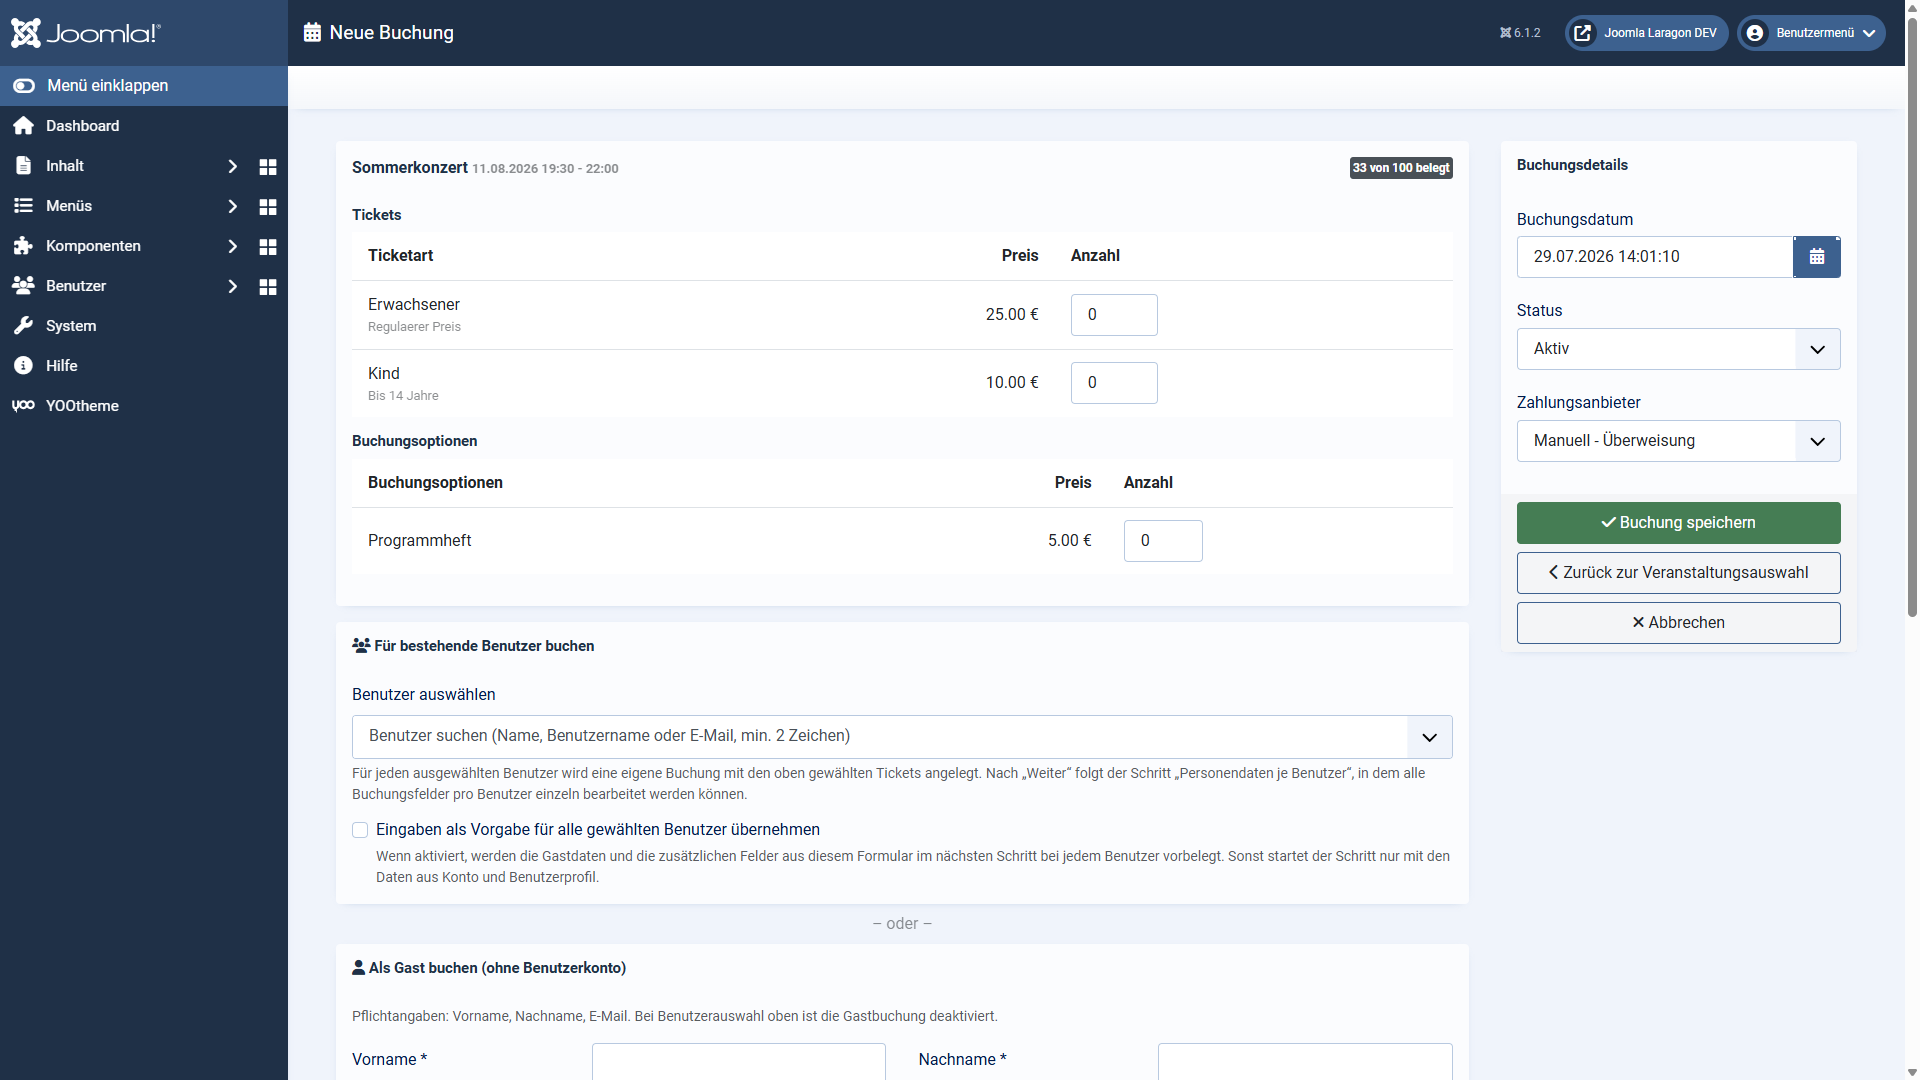
At the top, choose the number of tickets (per type if there are several ticket
types) and any booking options.
Enter the contact details in the card Book as guest: first name, last name and email
are required. Alternatively, select one or more existing users in the card above —
then the guest entry is not needed.
Fill in the additional fields, if your DPCalendar installation defines any.
On the right, under Booking details, adjust the booking date, the status and — for
events that cost money — the payment provider if needed.
Click Save booking.
Step 3: check the result
After saving you are back in the booking overview. The success message names the new booking
including the event date and links to it directly — one click opens the booking for checking or
editing.
The booking goes through the same DPCalendar logic as an online booking: tickets are created,
prices calculated, remaining places updated and — if enabled — the usual confirmation and
notification emails sent.
Where to go from here
All details about the selection list: The event selection
All details about the form: The booking form
Several people in one go: Booking several users at once
Applies to version 1.0.6.
